
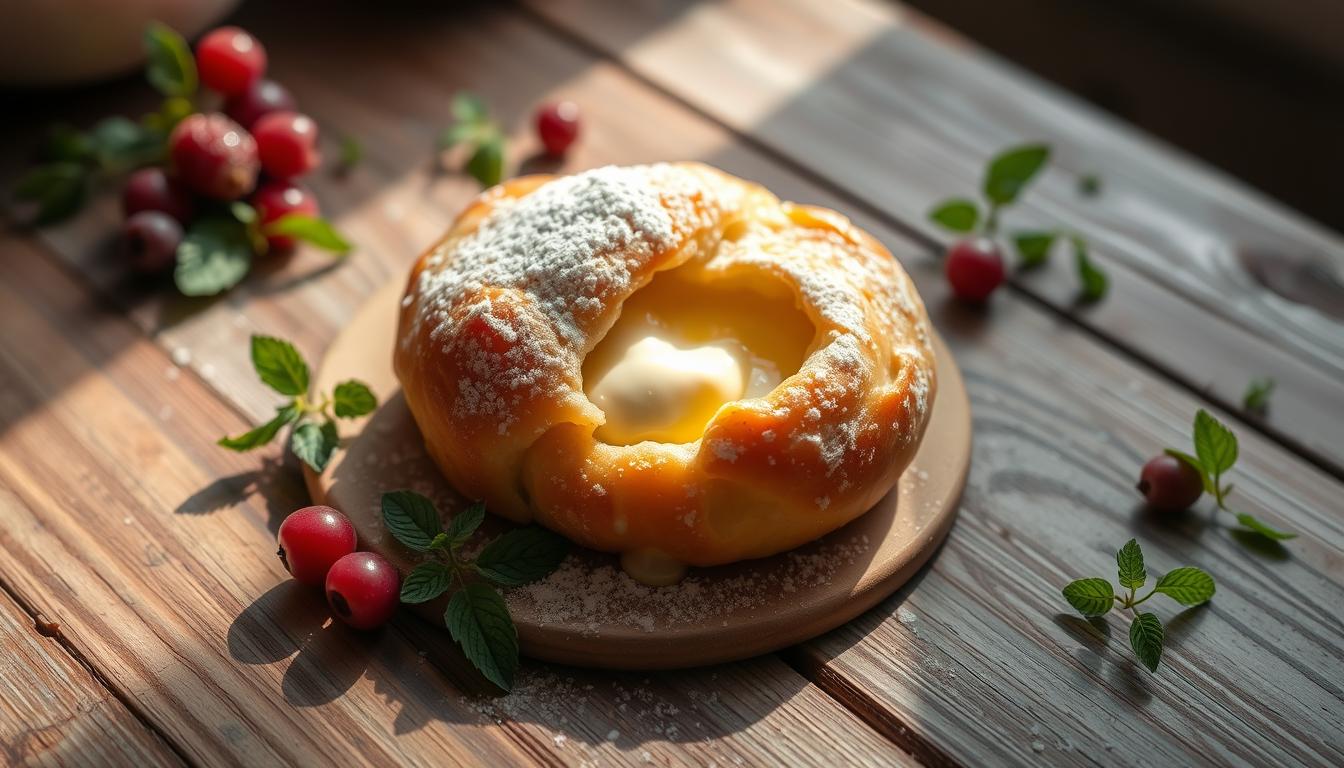
Welcome to the world of delicious cheese danish recipe. It’s a tasty danish pastry that can make your breakfast or dessert even better. We’ll show you how to make the perfect cheese danish.
Imagine a flaky, buttery pastry filled with creamy cheese. It’s perfect for any time of day. We aim to teach you how to make an irresistible cheese danish. You’ll learn about its rich history, essential ingredients, and how to make it step by step.
Whether you’re new to baking or have experience, this guide is for you. It will help you make a delicious danish pastry that will wow your friends and family. With our help, you’ll be able to make a perfect cheese danish recipe that will become a favorite in your home.
Introduction to Cheese Danish
In this article, we’ll explore the world of cheese danish. We’ll look at its origins and the modern-day versions. You’ll learn about the key ingredients, tools, and techniques needed to make the perfect cheese danish recipe.
Key Takeaways
- Learn the history and origins of cheese danish recipe
- Discover the essential ingredients for a perfect danish pastry
- Get a step-by-step guide on how to make a delicious cheese danish
- Understand the importance of using high-quality ingredients
- Learn how to troubleshoot common issues with your cheese danish recipe
- Get tips on how to store and reheat your cheese danish for maximum freshness
The Rich History of Cheese Danish Pastries
The cheese danish has a long history, starting in the 19th century. It comes from Denmark, where it was called “wienerbrød” or “Viennese bread.” Over time, the pastry changed, and cheese filling became a key part. This change is a big part of the history of danish pastry, showing how new ingredients and fillings were added.
Some important moments in the cheese danish’s development include:
- Introduction of new ingredients: The addition of various cheese fillings to the danish pastry.
- Cultural exchange: The impact of other European bakeries on the history of danish pastry, leading to new fillings and baking methods.
- Modern interpretations: Today’s bakeries trying new cheese filling recipes and ways to present them, while keeping the traditional history of danish pastry alive.

The mix of old techniques and new ideas has led to many cheese danish pastries. Each one has its own special taste and look. By knowing the history of danish pastry and how the cheese filling evolved, we can really enjoy this favorite pastry.
| Pastries | Fillings | Origins |
|---|---|---|
| Cheese Danish | Cream cheese, fruit | Denmark |
| Viennese Bread | Almond, chocolate | Austria |
Essential Ingredients for the Perfect Cheese Danish
To make a tasty cheese danish, you need the right essential ingredients. These include top-notch pastry dough, different cheeses, and eggs. The pastry dough is key, giving the danish a flaky and buttery feel that goes well with the cheese.
Choosing the right cheese is important. Mix cream cheese, ricotta, and cheddar for a rich taste. Don’t forget fresh eggs to add moisture and richness to the filling.

The quality of the pastry dough matters a lot. It should be made with the best butter and flour. Rolling and folding it creates the danish’s flaky layers.
- High-quality pastry dough
- Variety of cheeses
- Fresh eggs
With the right essential ingredients and a few tips, you can make a delicious cheese danish. Choose the best ingredients, including top-notch pastry dough, for a perfect danish.
Tools and Equipment You’ll Need
To get professional results in baking, you need the right tools and equipment. Having the right kitchen gear can really improve your cheese danish’s quality. With the right baking tips and tools, your pastry will turn out perfectly.
You’ll need some basic kitchen tools to start. These include a mixing bowl, measuring cups, and a pastry brush. Also, a stand mixer is a great investment for serious bakers. It helps with creaming butter and sugar, and kneading dough.
Basic Kitchen Equipment
- Mixing bowl
- Measuring cups
- Pastry brush
- Stand mixer
There are also optional specialty tools for specific baking tips and techniques. These include a pastry blender, a dough scraper, and a bench scraper. While not essential, these tools can make your work in the kitchen more efficient and effective.
Measuring and Temperature Tools
Accurate measurement and temperature control are key in baking. A digital thermometer and a set of measuring cups are good investments. They help ensure your ingredients are at the right temperature and your pastry is perfectly baked. By following these baking tips and using the right kitchen equipment, you can make a delicious and authentic cheese danish.
| Tool | Description |
|---|---|
| Digital thermometer | For accurate temperature control |
| Measuring cups | For precise measurement of ingredients |
Making the Irresistible Cheese Danish: Step-by-Step Guide
To make the perfect cheese danish, start with top-notch laminated dough. This dough is made by layering butter and dough. It gives a flaky and tender texture. With a step-by-step guide, making this tasty pastry at home is easy.
Here are the basic steps to follow:
- Prepare the laminated dough by rolling and folding it several times to create the layers.
- Roll out the dough to the desired thickness and cut it into the desired shape.
- Place the cheese filling in the center of the dough and fold the dough over to create a seal.
- Bake the cheese danish in a preheated oven until it’s golden brown and the cheese is melted.
By following these steps and using a high-quality laminated dough, you can create a delicious cheese danish.
| Ingredient | Quantity |
|---|---|
| Laminated dough | 1 package |
| Cheese filling | 1 cup |
| Egg, beaten | 1 |
Mastering the Laminated Dough
To make a tasty cheese danish, mastering the laminated dough is key. This method folds and rolls the dough to create layers of butter and dough. These layers make the pastry flaky.
Using the right folding techniques is crucial. It ensures the layers are even, making the pastry tender and flaky.
Temperature control is also vital. The dough and the environment’s temperature greatly affect the result. It’s important to keep the dough at a steady temperature. This helps the yeast ferment and the butter stay solid.
- Use the right type of flour, such as bread flour or all-purpose flour with a high protein content
- Keep the dough at a consistent temperature, around 75°F to 78°F
- Use the right amount of butter, about 25% of the total dough weight
- Fold the dough gently, using a gentle folding motion to avoid developing the gluten
By following these tips and practicing your folding techniques and temperature control, you’ll make a delicious, flaky laminated dough. It’s perfect for your cheese danish.
| Tip | Description |
|---|---|
| Folding | Fold the dough gently, using a gentle folding motion to avoid developing the gluten |
| Temperature | Keep the dough at a consistent temperature, around 75°F to 78°F |
| Butter | Use the right amount of butter, about 25% of the total dough weight |
Creating the Perfect Cheese Filling
A great cheese filling can transform dessert recipes. It should be creamy, tangy, and balanced. Use cream cheese, ricotta, and feta to get it right. Experimenting with different types of cheese is key to finding the perfect mix.
Here are some tips for creating the perfect cheese filling:
- Use high-quality cheese for the best flavor
- Don’t overmix the cheese filling, as it can become too dense
- Add a touch of sweetness to balance out the tanginess of the cheese
A well-made cheese filling can elevate your dessert recipes and make them truly special. Whether you’re making a classic cheese danish or something more innovative, the right cheese filling can make all the difference.
By following these tips and experimenting with different types of cheese, you can create a cheese filling that’s sure to impress. So why not give it a try and take your dessert recipes to the next level with a delicious and creamy cheese filling?
| Cheese Type | Flavor Profile | Usage |
|---|---|---|
| Cream Cheese | Tangy and creamy | Classic cheese danish |
| Ricotta | Mild and creamy | Cannoli and other Italian desserts |
| Feta | Salty and tangy | Greek-inspired desserts |
Shaping and Assembly Techniques
To make a breakfast pastry look good, you need to learn how to shape it. Shaping and putting together your cheese danish is fun and creative. With the right skills, you can make a pastry that will wow your family and friends.
There are many classic danish shapes to choose from, like spirals and pinwheels. These shapes not only look nice but also make the crust flaky and tender. You can also try modern shapes like braids and twists to make your pastry unique.
Classic Danish Shapes
- Spiral: A classic shape that involves rolling the dough into a spiral shape and filling it with cheese.
- Pinwheel: A shape that involves rolling the dough into a pinwheel shape and filling it with cheese.
Modern Variations
You can also try modern shapes like braids and twists. These add a special touch to your pastry. To make your pastry even more impressive, try creating intricate designs using shaping techniques.
Decoration Ideas
After shaping and assembling your pastry, it’s time to decorate it. Use egg wash, sesame seeds, or poppy seeds to add color and texture. With a bit of creativity and practice, you can make a stunning cheese danish that will impress everyone.
Baking Tips for Professional Results
To get a perfectly baked cheese danish, following the right baking tips is key. Keeping the oven temperature right is crucial for the pastry’s texture and taste. Make sure your oven is preheated correctly. Using a thermometer can help ensure the temperature is spot on.
Here are some important baking tips for professional results:
- Choose the right flour for the pastry’s texture and structure
- Avoid overmixing the dough to prevent a dense pastry
- Watch the baking time closely, as it changes with the danish’s size and shape
Getting professional results takes focus and practice. With these baking tips, you’re on your way to a tasty and beautiful cheese danish. Baking is an art that needs patience and time to get right.
By using these simple yet effective baking tips, you’ll impress your loved ones with professional results. Enjoy baking!
| Baking Tip | Description |
|---|---|
| Temperature Control | Ensure your oven is preheated to the correct temperature |
| Dough Handling | Don’t overmix the dough to avoid a dense and tough pastry |
| Baking Time | Keep an eye on the baking time to avoid overcooking or undercooking |
Troubleshooting Common Issues
When making cheese danish, troubleshooting is key to getting it just right. Even with a great recipe and techniques, common issues can pop up during baking.
To fix these problems, finding the cause is crucial. Here are some common problems and how to solve them:
- Dough that is too sticky or too dry
- Filling that is too runny or too thick
- Baking challenges, such as undercooked or overcooked pastry
Understanding the causes of these common issues and using troubleshooting techniques can help. Remember, troubleshooting is a normal part of baking.
With more practice, you’ll get better at troubleshooting and fixing common issues in baking.
Storage and Reheating Guidelines
To keep your cheese danish fresh, follow proper storage and reheating tips. After baking, you can store it at room temperature for a short time. For longer storage, use airtight containers or freeze it.
For up to 2 days, store your cheese danish in an airtight container at room temperature. Freezing is a good option for longer storage. Wrap your pastry tightly in plastic wrap or aluminum foil and put it in a freezer-safe bag.
Fresh Storage Methods
Store your cheese danish in an airtight container at room temperature or in the fridge. This keeps it fresh longer. You can also use wax paper or parchment paper to wrap it, keeping it fresh.
Freezing Instructions
Freezing is great for longer storage. Wrap your pastry tightly in plastic wrap or aluminum foil. Then, put it in a freezer-safe bag. To reheat, thaw it overnight in the fridge or in the oven or microwave.
Reheating Recommendations
Reheating is key to keeping your cheese danish quality. Reheat it in the oven at 350°F (180°C) for 10-15 minutes. Or, use the microwave for 20-30 seconds. Always check it to avoid overcooking.
By following these tips, you can enjoy your cheese danish longer while keeping it fresh and tasty.
Serving Suggestions and Pairings
The cheese danish is great for any time of day. For breakfast, pair it with coffee or orange juice. The pastry’s sweetness and the coffee’s bitterness make for a perfect start.
For a mid-morning snack, try it with fresh fruit like strawberries or grapes. The fruit’s sweetness goes well with the cheese, making it a healthy and tasty snack. Here are some ideas to enjoy your cheese danish:
- Pair with a cup of coffee or tea for a relaxing breakfast
- Serve with a side of fresh fruit for a healthy snack
- Enjoy with a glass of cold milk for a comforting treat
In the afternoon, pair it with hot chocolate or a fruit smoothie. The pastry’s richness is balanced by the drink’s sweetness, making it a great pick-me-up. With these ideas, you can enjoy your cheese danish at any time, whether it’s for breakfast, snack, or dessert.
Conclusion: Mastering Your Homemade Cheese Danish Journey
As you finish your homemade cheese danish journey, think about how far you’ve come. You’ve learned about the history, ingredients, and how to make the perfect irresistible cheese danish.
Now, you can make these delicious pastries in your kitchen. Remember, mastering the art of cheese danish needs practice. But with each try, you’ll get better and enjoy the taste of the dough and filling.
Keep trying new things and share your creations with others. Enjoy the process of making something special and relish every bite of your homemade cheese danish.
FAQ
What is the origin of the cheese danish pastry?
The cheese danish pastry comes from Denmark. It was first called “wienerbrød” or “Viennese bread.” Over time, it evolved, and cheese became a key ingredient.
What are the essential ingredients for making the perfect cheese danish?
To make the perfect cheese danish, you need quality pastry dough, cheese filling, and eggs.
What tools and equipment are needed to make cheese danish?
You’ll need baking sheets, parchment paper, a rolling pin, and a pastry brush. You might also use a pastry cutter and bench scraper. Don’t forget a digital scale and oven thermometer.
How do you master the laminated dough for cheese danish?
Mastering laminated dough means knowing how to fold, control temperature, and avoid mistakes.
What are the different types of cheese fillings for cheese danish?
Cheese fillings can be cream cheese, ricotta, or feta. The goal is to find the perfect cheese to go with the pastry.
What are some tips for achieving professional-looking cheese danish?
For a pro look, control temperature, bake right, and shape well. Add glazes or toppings for extra flair.
How should cheese danish be stored and reheated?
Store cheese danish in an airtight container at room temperature for 2 days or freeze for 2 months. Reheat in the oven or toaster oven to keep it flaky.
What are some serving suggestions and pairings for cheese danish?
Enjoy cheese danish any time, from breakfast to dessert. Pair it with coffee, tea, or milk for a classic treat.